
[et_pb_section fb_built=”1″ _builder_version=”4.9.7″ _module_preset=”default”][et_pb_row _builder_version=”4.9.7″ _module_preset=”default”][et_pb_column type=”4_4″ _builder_version=”4.9.7″ _module_preset=”default”][et_pb_text _builder_version=”4.9.7″ _module_preset=”default” hover_enabled=”0″ sticky_enabled=”0″]
The Basics of 3D Printing
I’ve been tinkering with my 3D printer for about a month now. I’m learning a lot and want to share here what I’ve learned are best practices and what not to do, or at least try to avoid. It’s become a big space and grown a lot, which is always good and bad. So I’m going to try and divide the two here.
One reason it’s taken me this long to jump into 3D printing is that the community hadn’t grown to a size that it was resource-wise reasonable for me to do so. I don’t have a pro shop or loads of free time to devote to this.
All new technologies need some time to grow legs and have failures, best practices, and communities evolve around them, no matter what you’re dealing with. 3D printing was on my radar many years ago, but I’m not an engineer or someone that has the brains or time to further the cause, it was.
The time, pricing, community size, and a few others aligned so I pulled the trigger. I’m a builder, creator, developer, designer, tinkerer, and a nerd by design, so this kind of pastime is perfect for me. I love woodworking and building models and tools and toys and whatnot. I always shave and I grew up with an impressive workshop and garage thanks to my dad. I marvel that I have all my fingers and eyes. I was electrocuted once, which was a big lesson learned. And I scratched my cornea when I was young, so that was another big lesson. And I’ve burned and cut myself more times than one would think humanly possible. So I try to be more careful these days, having so many. “not-so” close calls. I try my hardest to impart these lessons to my super-curious and active daughter, who takes after me with these things. Teaching patience is just impossible for some people, including me. It takes years of try and failure, unfortunately.
Moving on…
Although there are copious materials online and it seems overwhelming at first, I’ve noticed something as I try to curate and organize all the resources and articles and videos and forums and tools.
What that is, is that most of the articles and forums and solutions I just listed all seem to grow out of a handful of websites and people and locations. So while they seem overwhelming at first, all the craziness can be traced back to just a few more manageable sources, which I’m putting here for everyone’s use.
I’ve boiled things down to 4 large bins for now: Resouces, Forums, Models, and Learning. I’ve made them menu items as well as their own pages, for organization’s sake and for crawlability.
When to know if you should get a 3D printer at all:
Not everyone needs a 3D printer, of course. I’d argue lots of people do. But it’s an item you shouldn’t rush out to but on a whim by any means. Especially if you aren’t a “maker” type person. Some people build things, some people pay others to build things for them. That’s how humans are.
I’m a tinkerer by design. If you looked around my house and garage you’d spot that easily. I always need bits and bobs for solving little problems and fixing little disasters or helping my daughter with something or another. Her life is filled with tiny little objects for her dolls and toys, so being able to create them myself is a magical ability. I have already gotten her interested in 3D printing.
You have to know what 3D printing is good for and what it’s not.
It’s good for making little parts that you’d have to buy from a specialty place. If you live in a big city, that might be easy. If you live in the middle of nowhere, that’s impossible, except for ordering it online, which is searching for. a needle in a haystack most of the time.
It’s good for making specialty tools and boxes and things like a box I just printed to hold 20 AA batteries and 20 AAA batteries, instead of keeping them rolling around in a plastic tub or metal bin, as I’ve done for 20 years.
It’s good for engineering-minded people and crafters. It’s good for people that have a mind that thinks abstractly and then can put those abstract thoughts into a 3D space on a computer, and learn how to do that. That eliminates a lot of people right there. It’s not that difficult, however. Software developers TRY to make it as easy as possible and are ALWAYS releasing updated code that makes it easier and easier for you to work with their tools. That’s the great thing. And a lot of the software is open-source, so if you know some coding, you can fork it and make your own software to make your own projects. We’re there.
You can make a little side money with it, but I wouldn’t quit your day job. Some crafty people do things like hang out on automotive forums and snipe people that complain about not being able to locate certain parts. That’s target marketing taken to an extreme. But if you want to find a way to become wealthy with 3D printing, or think it monetizes itself, you may be disappointed. It’s one of those hobbies, like collecting antiques, that relies on intrinsic rewards instead of monetary. I’m sure there’s a lot of 3D-printed items on Etsy.
If you have a child, then I think it’s appropriate to have one for all sorts of reasons. It’s a way to learn a lot of different skills that are valuable today. Coding, design, 3D modeling, math, and self-reliance. It’s fulfilling to have an idea come to life in a real 3-dimensional space right before your eyes.
Although there are some great “basic” 3D printers and software(really only one basic software package and only a few REALLY basic printers, which will leave you wanting more after a week, most likely.) out there, still, you really need to be an autodidact and a “curious” person by nature at this stage to really get into it and start into it. There’s a lot to learn, and there isn’t that much hand-holding still. You have to figure out things on your own, or at least research and search for answers for a long time sometimes before getting a solution.
For example, when. I got my printer, which was built in China, so there was already a time and language barrier to consider, I had to assemble it myself. Not too complex, but might be daunting for some. And that was just the beginning.
Once it was “set up,” what then? OK, I had a printer and a large assortment of tools, some bagged up and some extra parts, like an extruder, and a bunch of things that looked unfamiliar, and a 1-page instruction “manual.” Plus an SD card, a USB cable, and a thumb drive. Would you know what to do then?
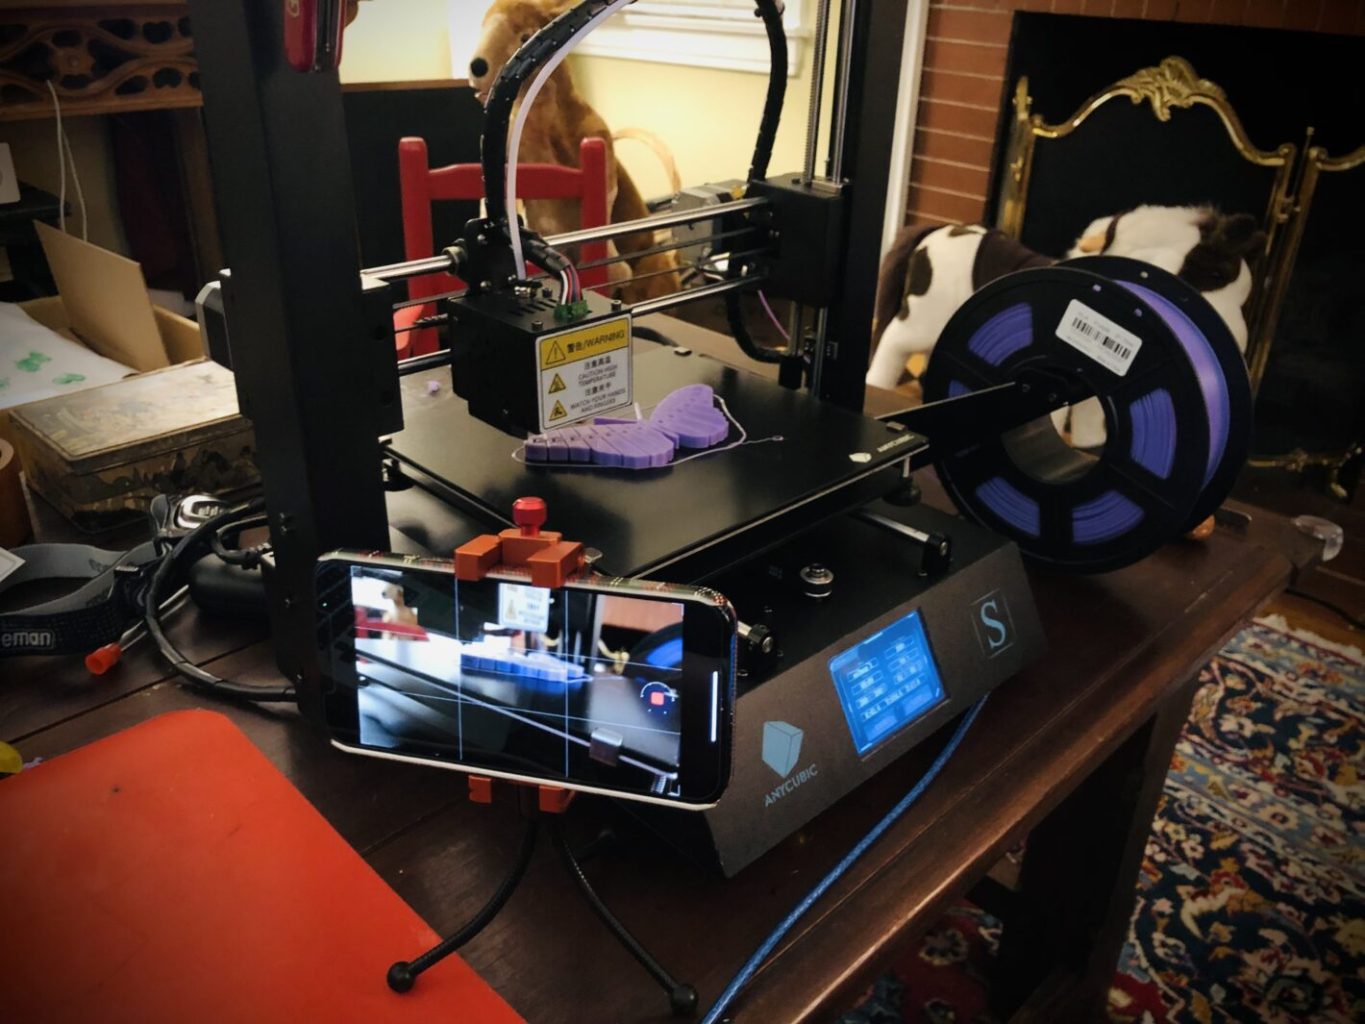
So it’s a lot of tries, white knuckle it, and see what happens type of learning. One of the reasons I chose the ANYCUBIC MEGA S printer was for the value, but another was the number and quality of resources online for support. In addition, the actual support ANYCUBIC offers is REALLY good. Considering the price point, the fact they’re in China and the complexity of the product, that’s impressive by any measure.
And I did need to utilize their support. When I set everything up and began to print a test file, I found that I couldn’t get the filament to slide easily into the feeder element, then into the Teflon tube, to the extractor, and heating element. That’s a major problem. And you don’t want to force anything.
I spent hours fiddling with it, in low light, at an odd angle, with poor eyesight, and with no help. These things are marvels of engineering, where access to screws gives you microns to work with. Seriously. And you’re using tweezers and tiny tools to access and fix even tinier parts.
After trying everything I could think of and looking online for videos forums or articles to help with my situation, I finally decided just to disassemble the thing and reverse engineer it. Fix it myself.
So after taking apart a very complex and delicate piece of nano-machinery and having springs, screws, levers, bits, and bobs, and every other unidentifiable piece in a pile, I fed the filament in by hand and reassembled the whole thing, and reattached it. Miraculously. Having no one to help, I had to wear a headlamp, as a spelunker would wear, and put a high-intensity flashlight in my mouth to see what I was even doing, which trying to screw the tiniest of screws into the darkest of space without being able to even see the screw hole. Crazy!
And after all that, the feeder still would grab onto the filament. Sigh. So I contacted the guys in China, and they were great. After a few emails back and form with some video I took of what I could and couldn’t do, they sent me a new part at no charge.
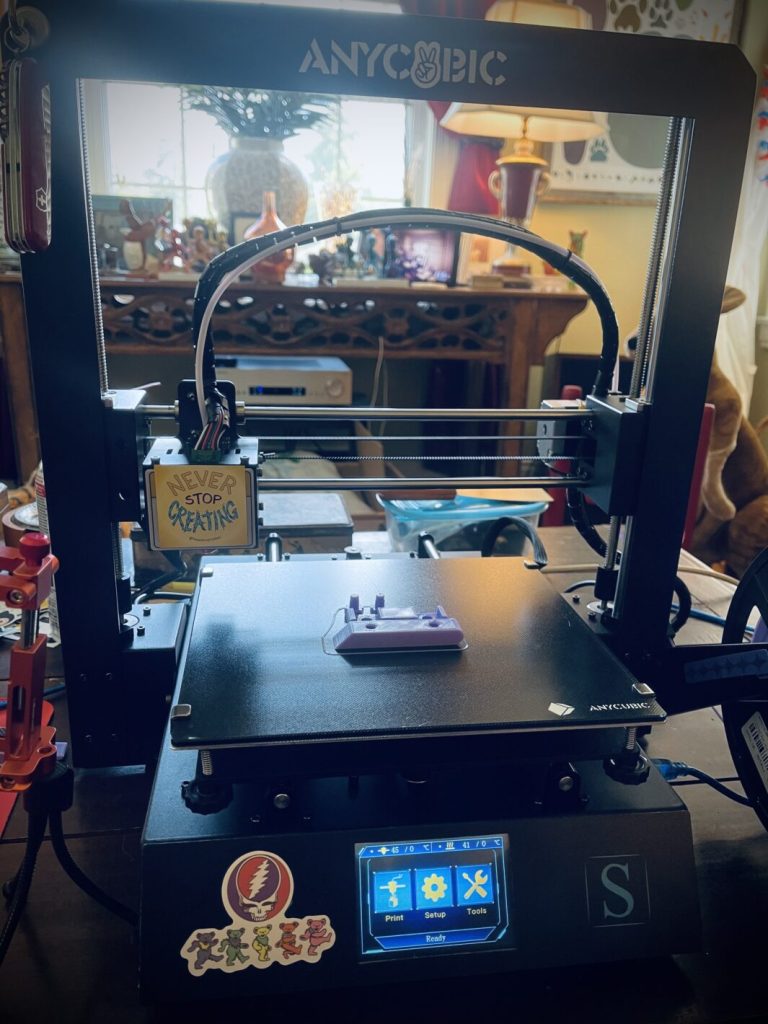
I received it, and replaced the old one and double-checked everything, and fired it up again It worked! But! Believe it or not, when I went to change out the filament a few days later, I had THE SAME PROBLEM. I contacted the ANYCUBIC people in China, and they replied immediately. I swear, they have some GREAT customer support considering the price point this printer’s in. Something to consider if you’re looking at printers. I’ve been impressed, and I can be a pain the butt when it comes to customer support, I admit. They tried to help me and offered to send me ANOTHER extruder. Those things aren’t cheap, and if they are sending me one, they’ve done away with their profit margin on me, I know.
So while chatting with Amber in China, I was clinking around with e extruder in question. If they’re willing to send me a third extruder, I have nothing to lose by being a little more forceful with it. So I got out a tiny screwdriver and started digging and prying and scraping and wonking the thing around. And sure enough, I fixed it!
Here’s the doohickey that’s giving me so much trouble:
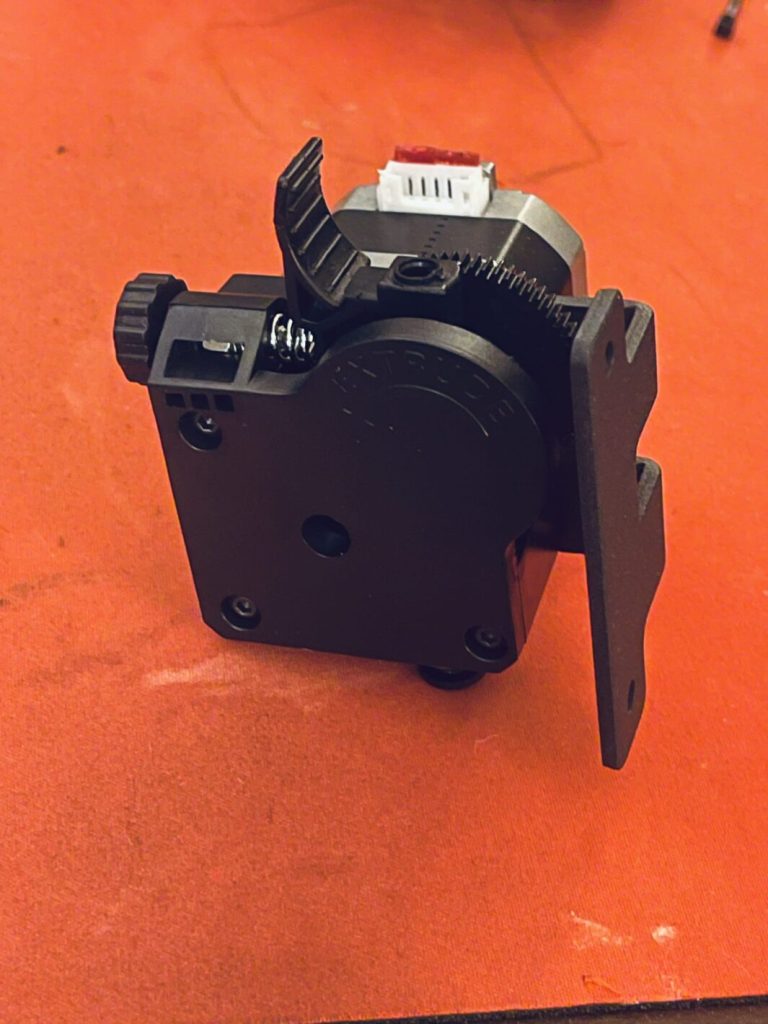
So this is an interesting machine. It’s very fragile and delicate to be sure because it’s working in microns and precision-engineered. It’s a robot and computer-driven machine. At the same time, sometimes you have to beat it and force things here and there. It’s like an F1 race car. Which makes it even cooler.
BUT! I had to learn how to work it first. You can’t just turn it on and hit a button and have whatever you want to pop out. Maybe one day, but not yet. Pretty close, though.
You need to learn a few things first. If you look at the resources page I have it will get you there fast, I promise. What I’ve saved on my website represents hours of reading and watching videos to filter it all down to the best and easiest way to hit the road running.
Firstly, I’d recommend reading everything you can about your printer, whichever one you settle on. Not just the “Get Started Fast” one-page instructions.
Find the user manual online and study it carefully. Re-read it. Go to the links within. This will save you a bunch of time and headaches.
Most popular printers have preferred slicing software. With my ANYCUBUC MEGA S, they recommend Cura by Ultimaker, which is very popular software with a great community based around it.
Something to note: when I bought my MEGA S, it was a new product to ANYCUBIC’s lineup and wasn’t even in the dropdown on Cura’s software/hardware matchup selector, (which is SUPER-useful.) However, within 2 weeks of having my printer, Cura had released a new version of their software which DOES include the MEGA S. That’s how fast things move in this space. Awesome!
You have to download STL files, from the modeling software, such as Blender, which is an open-source piece of modeling software that’s dynamic, powerful, and very popular. It’s what I use. And need to learn as well. Keep these things in mind! Tinkercad is another very good place to start and where my daughter and I will probably spend a lot of time.
When you build a model, you need to save it as an STL file (or obj or some other .files, but STL is the most widely used and most reasonable.) Bu these files can come up with errors or the code might be wonky. I haven’t gotten far enough along to know what can actually go wrong. But as usual, there’s a solution already available to help you. FormWare has a FREE! STL fil repair tool that you can use here.
Once you find s model or build a model yourself, it’s saved as an STL file, as I mentioned. The printer can’t read that file, because it’s just math. Not even math, just numbers, really. So you need to transfer that into slicing G-code which the printer can read, and use that data to know what to print where, and when. It prints in a 2D environment, 1 layer at a time, on an incrementally building plane, the Z-axis. It’s pretty basic if you think about it. I’m surprised it wasn’t invented long before it was, honesty.
SO the slicing software, Cura in my case, renders it and gives you a great environment to alter, fine-tune and view your model. When it’s all goo-to-go, you send it to the printer, with either a tethered USB cable or an SD card, or over a network.
The printer receives the data and starts heating up what needs to be heated. You set the filament diameter, nozzle diameter, fan speed, and bed and nozzle/melting temperatures among some other things. Depending on how sophisticated you are, you can even get down into the G-code and start customizing anything you want. Amazing!
SO, the printer gets into gear and prints. You can monitor the progress online or in my case on the touchscreen on my printer. Some prints can take a pretty long time. My longest one so far was about 20 hours and was a box for my many batteries. It’s so nice. Total cost to me, about .05.
But you aren’t quite finished when the printer stops.
In my case, the object comes very, very easily off the bed. It’s a heated bed, which is luxurious and something I’d recommend. The printer came with a spatula/scraper, which I haven’t really had to use. The items come right off with ease and no fuss or muss.
That’ isn’t the case with every printer, however, where you’ll have to put painter’s tape diagonally across the printer bed, or buy a top to put on it to protect and print on, then clean that with alcohol or acetone, and so on. So research that aspect. Another “Plus” for my Mega S.
When it comes off you’ll notice of course it was printed in layers, which you can dictate how thick or thin you want. There are variables to that decision of course and compromises to be made. Quality, strength, appearance, and so on. Those being the biggest though.
For the most part, for the types of rudimentary things I am building now, it’s no big deal. But I’m already hitting some snags (pun intended). You get burrs and strings here and there which may not be a big deal, and then again they may. For example, I printed. a small hand sanding block to knock corners off with and sand down projects for appearances, sake, or if I want to paint them, or any number of realistic reasons. When the first sanding block finished sprinting, it printed the base, the clamp, and 2 screws to hold it all together. Perfect! Except one of the small screws I printed has a tiny burr in the screw threads. So it won’t screw in properly.
So what I’ll need to do is isolate that 1 screen in that file to re-print I suppose. So I’ll need to learn how to do that. Possibly by starting to learn G-code, or maybe there’s an easier way with using Cura itself. I’ll need to research that to move forward. I don’t want to print the whole job over again, do I? No.
I bought some sandpaper from Amazon that has different grits in it that will be useful. I need much finer grits than I ever used for furniture or wood, or even metal. That’ll be useful for all sorts of reasons, especially making toys for my daughter and when I want to paint items or have them have. a luster. As when using metal filament or even wood, which I already have a spool of.
Which is another consideration. The budget you have for this endeavor. Are you going to be a hobbyist? Are you going to print parts for profit? It’s doable and people easily make thousands for printing things like automobile parts by lurking on automobile forums and messaging people that need certain parts they can’t find. People will model them up with the specs, and sell them for a high margin. And that’s just the beginning of ways to make money, only limited by your imagination, entrepreneurial and capitalist spirit.
Eash spool, of 1kg of material is around $20-35.00. That’s for different colors and popular types. For exotic filaments, they get pricier. And you can also find them on sale sometimes for very cheap. That’s something you’ll have to keep your eye on if you’re on a budget for yourself and not printing commercially. And even then, you should be working on a budget. You can get glow-in-the-dark filament, metal, clear, and all sorts of “exotic” filaments. Make sure your printer can handle them and you set your slicing software to the right settings. This is another area my ANYCUBIC MEGA S printer shines. It accepts abroad range of filaments.
So those are the basics as far as I’ve come upon them. This is where I am with my experiences, and I plan to go much further down the rabbit hole.
Tools
If there’s one thing I’ve learned in life and that I’m trying to teach my daughter it’s this: the right tool for the job makes all the difference in the world. And that really goes for software as well as tangible, mechanical tolls, cooking tools, writing tools, any type of tool. The best tool for a lot of jobs is really our hands. Especially in cooking and baking. And for a lot of other grunt, manual labor.
But as we accelerate into the future into the realm of nanomechanics and arrangements and engineering that was just a dream 100 years ago, we are in need of a lot of specialized tools. And it’s a slippery slope we have in front of us. If you’re a surgeon and being paid by insurance companies and can array and arm yourself with whatever you want basically, it’s no big deal. (Which isn’t how it should be, but it seems today it is. Anything goes because the people paying for the service are detached from the acquisition and buying and supervision of the whole deal. So a transplant can cost $1 million dollars. But that’s another post.)
I love tools. I built an awesome workbench to house and use all the many tools I collected over decades on. Which were all stolen in the blink of an eye. So I sold my awesome workbench. And find myself rebuilding my toolset from scratch. It’s an insane and frustrating task to search for and pay for the exact, or worse, things I already had and cherished. Women don’t get the attachment some men have to their hand tools. They are extensions of their hands, so when they disappear it’s like losing valuable attachments to our fingers. That’s not an exaggeration. And when you need them, and they’re gone, it’s frustrating. It’s why on a level I can sympathize with cats that are declawed. Those were their fingers and tools and feelers in a way. That tear up my house, belongings, and everything I once held dear until destroyed by a cat, but still.
I cook a lot. I have a lot of specialized cooking tools. I work on cars. I have a lot of specialized automotive tools. I used to woodwork a lot. I had a lot of specialized woodworking tools. You get the point.
Now I’m 3D printing a lot. I don’t think my printer has stopped printing since I finally got everything online, hooked up, calibrated, and ready to go. I’m printing, videoing, researching, writing, and storing what I learn that’s valuable, and growing this endeavor. And of course, one thing I’m learning is that I need some specialized tools. And will you, if you plan to take it seriously. I’ve already mentioned sandpaper. Here’s the rest of what you’ll need.
I’ve discussed this already but the slicing and modeling software I’m using is Cura and Blender. A lot of this may seem like “duh” but although it’s common sense, it’s some stuff that adds up, like lots of different materials and colors of filament. You can have a small fortune invested in the filament. And where are you going to safe keep it? You can’t just pile it up in a corner because of humidity and other elementary doctors that will ruin it. Boxes, desiccants, bags, and storage cost $. My printer came with a lot of needed tools like a scraper and nozzle cleaner and hex wrenches, pliers/cutters, etc… but you need a lot more than that.
I bought some higher temp nozzles off Amazon that were pretty cheap. And I already have a Dremel with 5 speeds which rocks, and I have a slower RPM rotary grinder, plus accessories, I got from Harbor Freight for less than $9, which is a deal no matter what. I have my daughter’s glue sticks, and painters’ tape galore from oh, so many painting jobs.
I bought. a cutting mat and ANOTHER set of digital calipers off the Geek mobile app, which is. apart of the Wish mobile app, which all are owned by Amazon. Good places to get good electronic geeky stuff cheap straight from China if you don’t mind waiting a little bit. You can be notified by text as to where your shipment is. I’ve found some incredible deals on all sorts of little stuff on these apps. I don’t know what the margins are on these items but they must be incredibly small. It makes me think…
Speaking of Amazon I bought a deburring tool off Amazon that will come in handy for many of my little projects, from automotive to PVC pipes I cut, to copper and pipe cutting to 3D printing. The cost and quality of these things compared to what they’d be just 20 years ago baffles the mind. Thank you, China.
I already have x-acto knives galore, if. I can now find what I’ve done with them. I hide these sorts f things so my 5-year-old daughter doesn’t get her little hands on them, but sometimes I hide them too well.
Same with flashlights. I have SO MANY FLASHLIGHTS. Which I consider a good thing. I am totally prepared for anything, anytime. I am a Boy Scout and always will be. If you think that’s a bad thing, which I assure you people do these days, please try to explain to me why.
Also a can of compressed air to blow out dust and little things you don’t want in and around your printer. The list really never ends….
But, here is a thorough list of basic tools you’ll want to have on hand:
## Glue stick – Build plate adhesion is an important part of creating great 3D prints. Glue sticks come in particularly handy when you’re trying to get your print to stick – simply cover your print bed with soluble glue, and the adhesion will improve immediately. Some people favor hair spray, but we’d personally recommend glue, as you can be more precise with the application, plus there’s less risk of accidentally spraying the gantry or moving parts. For material-specific adhesion guidelines, check out this support article.
##Spatula or palette knife – On occasion, you might find that your 3D print has stuck a bit too well to your build plate. When this happens, a spatula or palette knife normally solves the problem. All you’ll need to do is ease it gently under the print and carefully lift it up.
Over time, you’ll probably get a collection of different palette knives. To start with, we’d recommend getting a palette knife that’s stiff, and one that’s flexible. Titan’s stainless steel scrapers have a tapered tip, which we find works particularly well.
##Deburring tool/knife and cutting mat – A deburring tool is great for cleaning up modeled holes, and for removing small pieces of plastic from your printed parts, especially brim. You’ll also need knives to tidy up your prints, as they seldom turn out completely perfect. A deft flick of the knife can remove unsightly plastic blobs or filament strings, making the end result look smoother and cleaner. We recommend investing in a knife with exchangeable blades (such as an X-Acto knife), and a cutting mat too. As I mention, I bought a nice deburring tool that’ll work for other projects as well off Amazon. I bought a cutting mat from Geek and Exacto knives can be bought cheaply at Harbor Freight Tools.
##Pliers – Pliers have a variety of uses, from print core maintenance to fixing your 3D printer. Look for a good quality pair of pliers with a rubberized, slip-resistant grip. You’re likely to need more than one type – we’d recommend needle nose and wire-cutting pliers (which are particularly useful for snipping away support material or trimming filament).
##Blue tape – Masking tape is one of the most basic tools you’re likely to own, and also one of the most widely used. Adding masking tape to the print bed is a simple, effective way to help your 3D printed object adhere to the print bed. It also makes removing the finished print far easier, and it protects your print bed from scratches.
Make sure you choose masking tape with a width of at least 50mm (2 inches). When the tape’s wide, it means you’ll need fewer strips to cover your print bed – something you’ll be grateful for if you need to resurface your print bed on a regular basis!
##Magnalube and Unilube – Sometimes, you’ll need to lubricate the X and Y axes, just to ensure they keep running smoothly. The best lubricant to use is Unilube, and all it takes is a single drop to resolve any issues with dryness. For the Z trapezoidal leadscrew, use Magnalube.
It’s important not to use WD40, as this affects the axle coating and can cause damage to your printer. Read more about it here.
##Digital caliper – A digital caliper has many applications in 3D printing. It’s useful for checking the precision of your prints, and you can also use it to dimension parts to replicate in CAD software. Calipers are also handy for checking filament measurements – as filaments aren’t often manufactured to exact measurements. Simply measure it at a few different positions, average the readings, then adjust the filament diameter in your slicing software if necessary.
Analog calipers work too, but don’t offer the same precision.
##Tweezers – Tweezers are useful to have to hand whenever you’re printing. They’re great for plucking oozing filament from the extruder nozzle before it starts printing (which means no more burnt fingers). They’re also handy for cleaning up your print afterward. We’d recommend purchasing a set of tweezers in various shapes and sizes, to ensure you’re covered for every eventuality.
##Sandpaper – It’s a good idea to have a selection of sandpaper in a variety of different grits. These will all prove useful when you’re post-processing your 3D prints. Our recommendation? Have a selection from coarse (220 grit) to fine (1000 grit), and invest in well-known brands such as 3M, as they’re likely to last you longer than cheaper, inferior types.
## Screwdrivers/hex key screwdrivers – Most people already own a good selection of screwdrivers and hex keys. If you don’t, it’s worthwhile getting some, as you’ll periodically need to re-tighten the gantry screws and the stepper motors of your 3D printer. Hex nuts and bolts are widely used in 3D printer assembly, so it’s also a wise idea to have a set of hex key screwdrivers and wrenches.
##Adhesion sheets – Adhesion sheets are compatible with most materials and boost adhesion to the build plate. They’re a good replacement for a glue stick, as they’re easy to remove and can be used multiple times. Another advantage is that they’ve been specially developed to cope with high temperatures, unlike masking tape. However, it’s important to check that the sheet is applied correctly, as air bubbles mean you won’t have a flat printing surface. You can find out how to apply the sheet here.
##Desiccant and re-sealable bags – 3D printer filament absorbs water over time. This causes degradation, which eventually leads to complications during printing. To avoid water absorption, simply store your filament in a sealed container or plastic bag, and add some desiccant to ensure all moisture is removed from the environment. Silica gel works perfectly. Here are some more storage recommendations to help you. For a more automated solution, the Ultimaker S5 Material Station was developed to store and deliver material in optimal conditions for 3D printing.
##Permanent marker – Permanent markers (such as Sharpies) are useful for marking 3D prints, especially when you’re running multiple prints of the same model, but with different slicer settings. Simply note down the sequence and settings for each print on the finished objects, and you’ll be able to tell them apart later on. Even leading architects do this: The team at Killa Design draws on their models to note where their design can be improved.
##Advanced 3D Printing Kit – The Advanced 3D Printing Kit for Ultimaker 2+ contains two 0.4mm nozzles, two TFM couplers, 25 adhesion sheets and a door. These keep your 3D printer running smoothly for longer. The nozzles and TFM couplers are convenient replacements, the adhesion sheets are great for keeping your models in position, and the door keeps warmth inside the printer, which prevents certain materials from warping and delaminating. Find out more here.
##Other useful tools
The following tools might not be as essential as the list above, but they’re certainly useful to have around. Obviously, it depends on what you’ll be using your 3D printer for, as some are more suited to particular jobs than others.
##Flashlight. If your 3D printer already has integrated lighting, you won’t need this. Otherwise, it’s a useful tool to have, even in well-lit areas. The inside of an enclosed 3D printer can be dark, which makes it different to judge print quality on detailed models. A compact LED light works perfectly.
##Paper towels. Paper towels are always useful for cleaning and drying your build plate, and best of all, they’re cheap too!
##Pencils and paper. You’ll inevitably need to jot down dimensions and make sketches while printing, so it’s a good idea to have paper and pencils to hand at all times.
##Wire cutter. Wire cutters are excellent for removing support and creating a cleaner, neater finish.
##Dremel. A Dremel is a handheld, high-speed rotary tool, which features a range of accessories. These accessories let you undertake a variety of applications, including cutting, sanding, carving, and grinding. When you’re 3D printing, it can be used to remove support material, sand down rough edges, or polish 3D prints made from metal-containing filaments. You can find a low-speed rotary tool from Harbor-Freight for under $10.00. Seriously.
##Extra filament. It’s always useful to have an additional filament spool on hand. A spool lasts a while, but won’t keep you printing forever! Also, it’s nice to have a variety to choose from, depending on your requirements. This is going to be a personal and job-specific choice. But this can become a big deal if you start printing some big, exotic prints. And this will lead you to look at humidity-controlled boxes to keep the filament in. 3D printing is a rabbit hole that runs on forever! Don’t let it swallow your bank account!
##Extra glass plate. If you are printing 24/7, having a spare glass plate could really speed up your workflow. It allows you to quickly swap glass plates when starting a new print, instead of having to wait until the build plate has cooled down to remove the print.
##Dissolving kit (bucket of water and pump). You’ll need to be able to remove your water-soluble PVA after printing – and a bucket of water does the job nicely! A pump ensures PVA supports dissolve faster.
With the right tools, the chances of producing a flawless 3D print are greatly increased. A 3D printer and a computer do most of the hard work, but it’s the tools that polish and perfects the models afterward!
[/et_pb_text][/et_pb_column][/et_pb_row][/et_pb_section]